Huf Telematics Commissioning
Overview
Commissioning of Huf telematics units (TUs) is now integrated within IR3. Technicians will be granted permission to view the Telematics Boxes page within Curate from where they will be able to view latest information from a TU and Commission/Recommission a unit.
On the Telematics Boxes page the user enters the IMEI of an existing TU into the search box and selects the device from the list below.

Driver ID & Tracking
The current status of Driver ID and Tracking is displayed on the Info tab, as shown below:
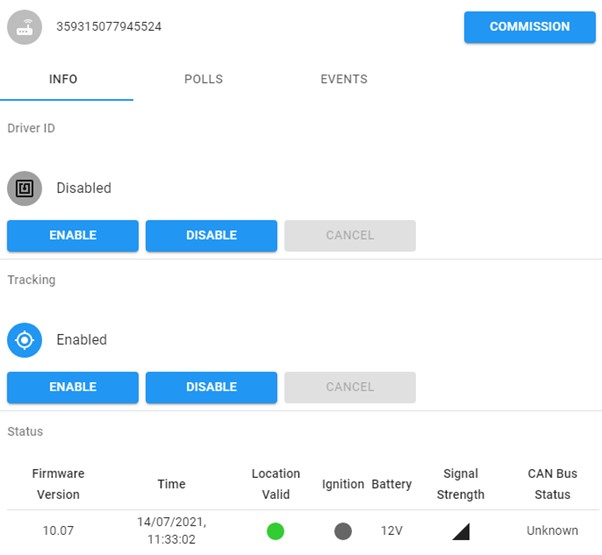
Driver ID may be enabled or disabled as required from this screen, without the need to fully commission a unit. It is particularly useful if the user is not at the vehicles, as the operation is queued for action when ignition next goes off. It is also possible to enable or disable Tracking from this page. After tapping the relevant button, the update will be applied the next time ignition goes off.
Please note that when tracking is disabled, the left-hand (GPS) LED will change to steady red.
The Polls tab displays the most recent reports from the Telematics Unit (TU).
The Events tab displays the most recent Driver IDs recorded and the latest equipment activations.
Tapping the Commission button starts the recommissioning process, displaying a pop-up window where the 5 tests / steps will be conducted:
- Enter Vehicle Information
- Perform Input Test
- Set Driver ID
- Test Driver ID
- Notes
All but the first step may be skipped as appropriate for the vehicle.
Step 1 – Enter Vehicle Information
If the TU is already associated with a vehicle then that information will be displayed. If the TU has not yet been associated with a vehicle then the VIN, Fleet Number and Type must be supplied.
Please note, if the TU is already associated with a vehicle then the vehicle information cannot be changed on this page. If the vehicle is incorrect or has changed then the TU must first be removed from the vehicle by returning to the previous page and tapping Remove.
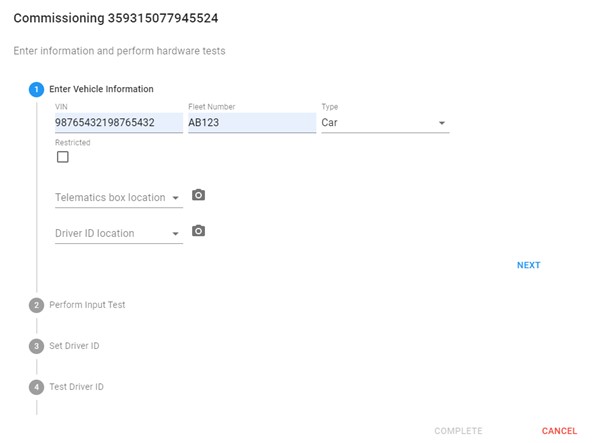
Essential information about the vehicle must be entered here. VIN, Fleet Number, and Type are mandatory.
Once the vehicle information has been correctly entered, tap Next.
Step 2 – Perform Input Test
In this step any connected equipment may be tested. Follow the instructions on-screen to test each input.
Any input that has not been connected may be skipped and a reason given, for example
- Not Applicable, if the input is not connected, or
- Unable to Test, in the case of the siren in some locations
As each instruction is followed and input tested, tap Next to proceed to the next input.
Wherever possible, inputs should be tested one at a time by turning the equipment on for a moment and then off again. However, in some cases this will not be possible if two items are controlled by a single switch. In such situations a warning might be displayed to the effect that other equipment was active at the same time, but if this is unavoidable then it will still be possible to tap Next and proceed.
It is also sometimes the case, that an input can only be activated very briefly, for example when testing the siren. This will also result in a warning to show that the input went on and the off again, but it will still be possible to tap Next and proceed.

If at any stage it is not possible to test an input, for example if siren cannot be tested because of the location, it may be skipped by giving a reason.
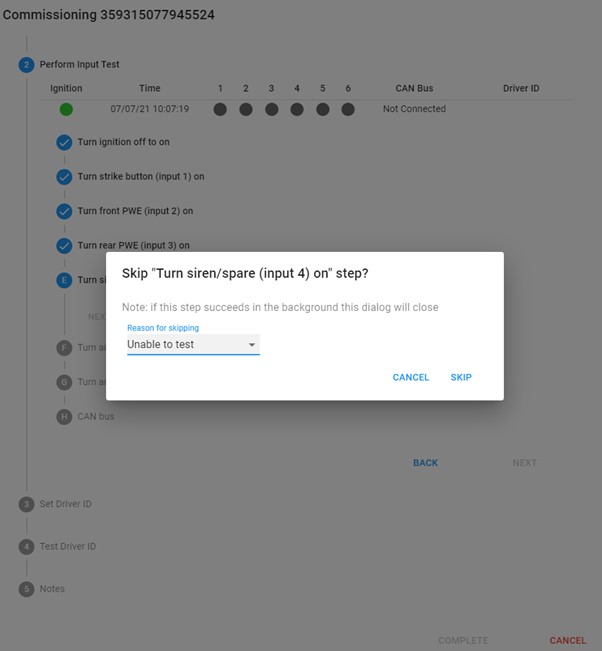
The test of CAN bus is automatic and CAN bus will be detected without any explicit action. Note that, in these screenshots, CAN bus is not connected to the unit under test (UUT)
Step 3 – Set Driver ID
This step is specifically to enable, or disable, Driver ID. Testing is performed in the next step.
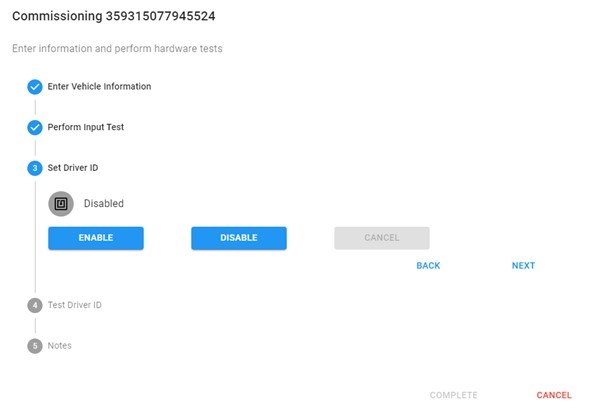
Tap Enable or Disable, as appropriate, and follow the instructions.
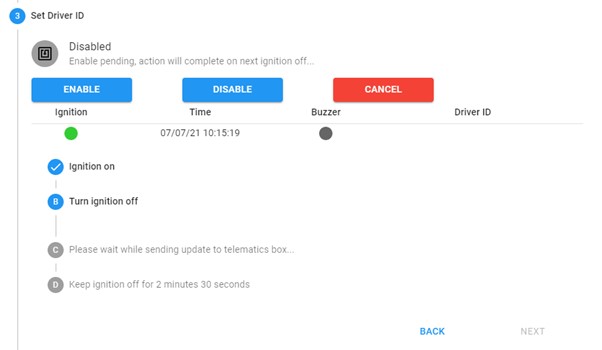
This step requires that the user wait after some actions for the TU to respond, in which case a timer counts down on screen before the next instruction.
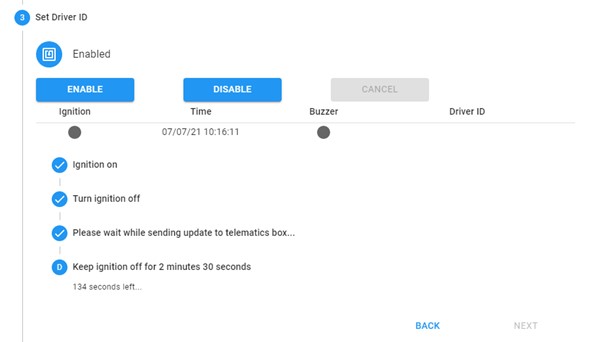
Once the timeout is complete the Next button becomes enabled.
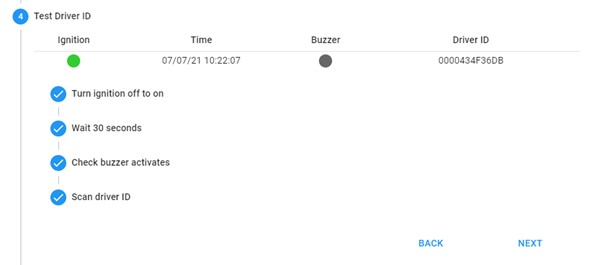
Step 4 – Test Driver ID
This step enables the operation of the buzzer and Driver ID reader to be tested. The actions should be followed in the order displayed on-screen but because of the nature of this test they might appear initially to occur out of sequence. However, once all actions have been completed the sequence should be resolved automatically and the test will complete successfully.
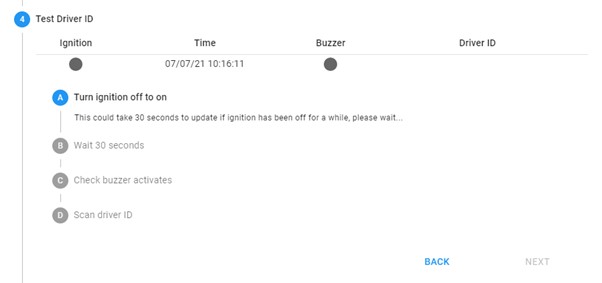
Follow the instructions on-screen and present the RFID card once the buzzer has sounded. The test will then complete automatically.
Step 5 – Notes
The last step is the opportunity for the user to enter any notes relating to the testing. For example, anything noted about the vehicle may be recorded here. When all steps have been completed, tap Complete.
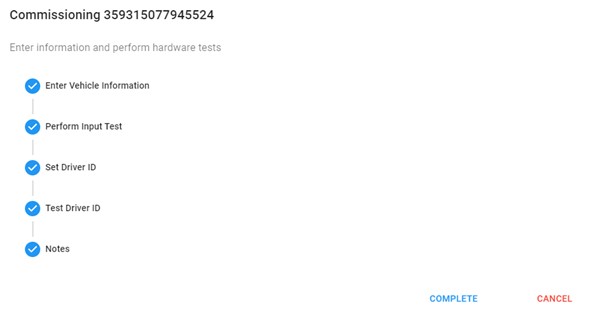
On tapping Complete the window will be removed and the user is returned to the Telematics Boxes page.